 Virtual Colossus
Virtual ERNIE
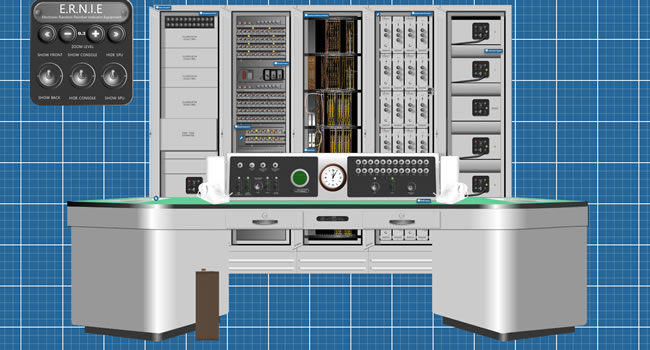
Virtual ERNIE is a working simulation of the original ERNIE 1, so you can learn how it worked. Please note that its random numbers aren’t genuinely random, but are made by your computer’s pseudo-random calculations (so don’t use it for any real draws!).
To get started, you can also download the getting started guide (PDF).
Moving around and clicking
To see different parts of Virtual ERNIE, click and drag the page, or use the scroll bars. To look closer or get a larger overview, use the mouse wheel (if you have one) to zoom in and out, or on a touch screen, pinch to zoom as normal. The control panel at the top left also has buttons to change the zoom level.
Try clicking the switches or keys: anywhere you see the hand icon. For switches, click or press the top of the switch to move it up, and the bottom to move it down.
The control panel also has switches that 1) turn Virtual ERNIE round so you can see the back, 2) show or hide the console, and 3) show a “portal” to the remote SPU (spur, or file) teleprinters. (A space-time portal was not part of the original design!)
Look for the blue help buttons dotted around, which give more information on each section.
The console
The console is the large desk at the front and centre. It holds the two main teleprinters that print the numbers generated by ERNIE, and the main controls.
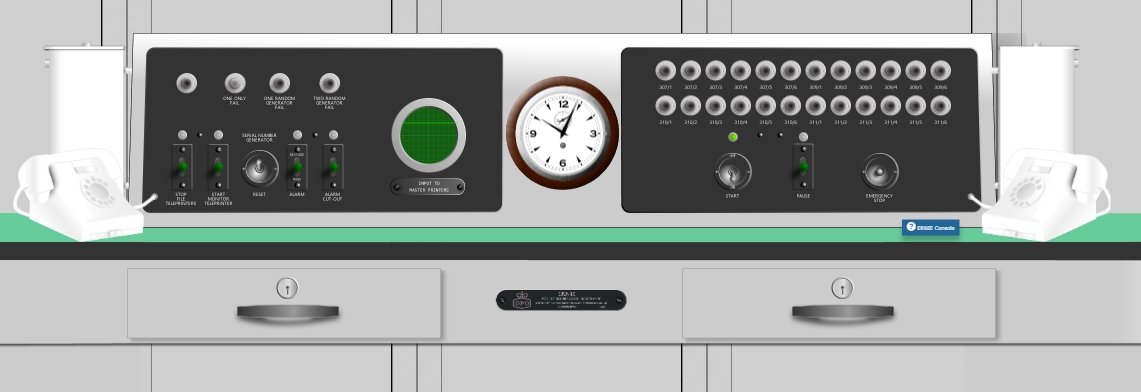
The left-hand controls on the console hold the warning and error lights, plus the teleprinter controls and the reset and alarm keys. The oscilloscope on the right of this panel shows the output to the teleprinters. For more detail on these controls, click the blue help button “ERNIE Console”, just to the bottom right of the console on screen.
The right-hand panel on the console has a set of warning lights, one for each of the remote spur teleprinter stations, along with the start, pause and emergency stop keys.
To start ERNIE, click the lower half of the start switch on the right-hand panel of the console.
If you have sound on, you should hear the teleprinter start up, and the master printer oscilloscope will start showing the output. To see what is being printed, move to the printer at the far left of the console desk. There is a blue zoom button there that tries to zoom you right in to the teleprinter (this may vary between computers and browsers). Some browsers are better than others at showing such small, rotated text, so it may look a little blurred. If you’re struggling to read the teleprinter, there is a monitor teleprinter that shows the output the right way up.
Click the lower half of the switch marked “Start Monitor Teleprinter” on the console to show it.
The output is a series of “randomly” generated nine-digit Premium Bond numbers, each with an increasing serial number showing the order they were printed in (higher-value prizes are allocated first!).
To stop Virtual ERNIE, click the Pause key down (it stops after the current number is finished), then switch the Start key back up to Off and un-pause.
Pressing the Emergency Stop button trips the power breakers, and all the lights go out. If you do this, you’ll need to reload the page, or find the circuit breakers at the bottom of the second rear rack to restart.
The front of the console has two drawers. The left-hand one holds a link to a YouTube video, “The Importance of Being E.R.N.I.E.”, an instructional film made for the General Post Office in 1964. The right-hand drawer holds a series of Post Office Engineering Department research reports, with lots of extra information. Click or hover on one to see it closer up; the full PDF of each can be downloaded to read offline. These PDFs are © BT Heritage and are also available on the BT Archives website, along with many photos (search for ERNIE).
The front racks
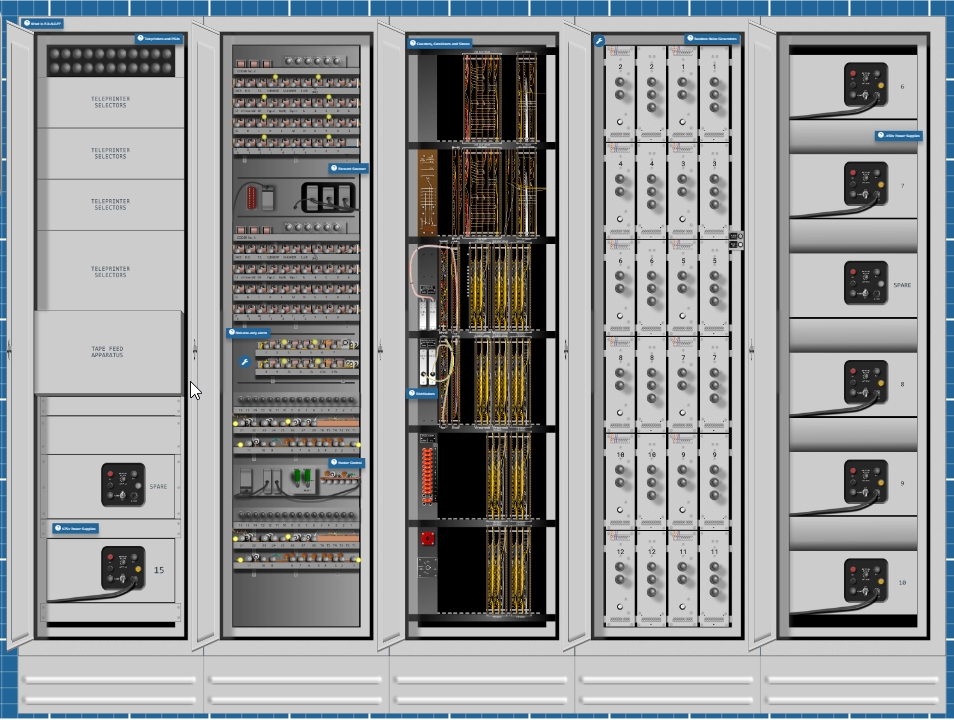
ERNIE is housed in five double-sided racks, kept closed and locked during the draws to prevent tampering. You can open the rack doors by clicking the door handles.
The front racks are numbered five down to one, from left to right:
- Teleprinter selector circuitry and power supplies.
- Element scanner, one-only alarm and the master control circuitry.
- Counters, combiners, core stores and the master and character distributor printed circuit boards. (ERNIE 1 was the Post Office’s first large-scale use of transistors and printed circuit boards.)
- Random noise generators and binary triggers: the part that actually generates the randomness.
- Power supplies.
For more detail, see the blue help buttons by each rack, or start reading the research reports in the right-hand drawer of the console.
A few things to try
1. What happens if a power supply is switched off?
Switch off PSU number 7 on front rack 1, the far right rack (the small on/off switch in the centre of the PSU), to simulate a failure.
First the alarm goes off, as ERNIE has lost power to some of its random number generators. Stop it by pressing the ALARM key on the console up to Restore, or set the Alarm Cut-Out key down to disable it. ERNIE was built with plenty of spare parts ready built in, so if a fault happened, a replacement could be switched in as quickly as possible. Each power supply has a cable connecting it to the rest of ERNIE, so to replace this “faulty” power supply, just move the cable to the PSU marked SPARE just below it.
Click the end of the cable connected to the PSU: it swaps to the nearest spare. Switch the spare on, and you’re good to go.
2. What happens if a random number generator fails?
On rack 2 (the random noise generators) is a blue button with a spanner icon. It lets you disable one or more of the random number generators to see what happens. Because ERNIE was wired with two separate random generators feeding each digit of the bond number, it could keep working even with one of them completely failed.
Set a fault on one of the random number generators using the spanner button.
The “One random generator fail” warning light comes on at the console to warn the operator, and the cold-cathode tube on the related binary trigger fires and lights up, showing that the number of random pulses has fallen below a set level. ERNIE can carry on generating random numbers without any problem. But if a second generator fails, both generators feeding a single digit could be down, so ERNIE pauses automatically and shows the “Two random generator fail” warning until the generator has been swapped for a spare or the fault fixed. (Click the spanner icon again to fix the fault.)
3. What happens if a teleprinter jams?
On the Virtual ERNIE control panel at the top left of the screen, set the switch marked Hide/Show SPU down to “Show SPU”.
You should see the remote file teleprinters. As ERNIE generates numbers, they are routed automatically to one of the eleven sets of file teleprinters, so if ERNIE is running you should start to see some bond numbers being printed. If a fault happened, such as a paper jam, the SPU station operator could alert the main console by pressing the Call key down (the left of the two green switches on the grey box above the right-hand teleprinter). This lights the matching warning light on ERNIE’s main console. The number shown by the warning light isn’t the denomination: it’s the internal phone number of that SPU station. Seeing this, the main operator would set the Pause key down. Pausing not only stops ERNIE generating new numbers, but also turns on a light on top of every SPU box to show ERNIE is paused. The right-hand telephone was on the internal phone network, so it could be used to call the station with the fault to find out what was wrong and help fix it. Once the problem was fixed, the SPU station resets its Call key and ERNIE can carry on printing.